Sunday, August 31, 2014

Watercolor Blocks

Happy Sunday, everyone!  I hope everyone is having a wonderful long weekend!  Today I am playing along with Winnie and Walter's challenge for day 3 of their Share the Love week featuring Simon Says Stamp.  Today's challenge is to create a background using one stamp or one stamp set.  I used Simon Says Stamp's Favorite Flowers stamp set for this card.

Here is the card I made:


First, I die cut the rectangles using Pretty Pink Posh's Stitched Duo Dies 1 and Tim Holtz watercolor paper.  Then, I assembled all of the rectangles so they were side by side and taped them together on the back so the images would line up.  Next, I stamped the images using Versamark and then heat embossed them with some clear embossing powder that has glitter in it.  Next, I watercolored the images.  Once they were dry, I assembled the rectangles in spaced out strips on the card.  I used my Silhouette to cut out the Winnie and Walter sentiment from silver glitter paper to match the sparkle of the watercolor paper.  To finish it up, I threw on some enamel dots and I was done!  I think this card turnd out so pretty!  I don't always think of kraft paper being pretty, but with the florals and glitter all over it, it definitely fits the bill.  :)

Here is a close up of the glittery details:


I am going to submit this card for this week's Simon Says Stamp Wednesday Challenge, where the theme is Anything Goes.

Thanks for stopping by today!  I hope your weekend is wonderful!

Until next time...
 photo Signature_zps1df7bf72.png

Friday, August 29, 2014

Winnie & Walter Craft Dash

Happy Friday, everyone!  Today I am playing along with another Winnie and Walter challenge featuring Simon Says Stamp.  Again, I am so grateful Winnie and Walter has cut files to play with so I can play along with these challenges! 

The challenge I am participating in today is a nod to Pretty Pink Posh's 10 Minute Craft Dash challenge.  I loved that challenge and was lucky enough to win one!  I was so excited to get to do another one as it really is different putting a card together when you have less than 10 minutes to do so.  There is way less thinking involved so you don't have time to second guess yourself. 

First off, I gathered my supplies,  For these challenges, you are allowed to have all of your supplies handy, you just can't have anything assembled yet.  I pre-cut my sentiment, but honestly, it would only have added about 30 seconds to my time if I hadn't yet.  Here is everything I used:


Then I started the timer and got to work.  Here is the card with my finishing time:


It's hard to see in my pictures, but the sentiment is cut from black glitter paper.  I stamped some flowers and leaves onto white cardstock and then trimmed them out.  I adhered them and then applied the sentiment using Glossy Accents to make sure it stayed.  I threw on some enamel dots and I was done!  Love it!

Here is a better picture of the finished card:


I had so much fun participating in this challenge!  I am also submitting it to this week's Simon Says Stamp Wednesday Challenge, where the theme is anything goes.  Thanks for stopping by today!

Until next time...
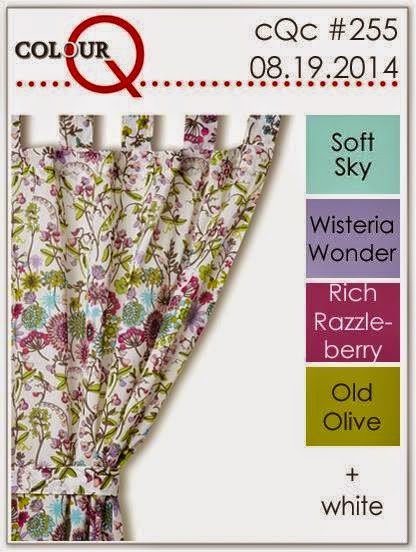
 photo Signature_zps1df7bf72.png

Thursday, August 28, 2014

A Rainbow of Thanks

This week Winnie and Walter stamps and Simon Says Stamp are working together and throwing out some challenges in the process.  I am playing along with one today, with the theme of using a rainbow color palette.  I have been a fan of Winnie and Walter stamps since I stumbled upon them, but I have yet to get my hands on any of them yet.  I am so glad that they have cut files that go along with their stamps so I can still play along!

Here is the card that I made: 


I created a stencil using my Silhouette and then filled it in using Distress Inks.  I cut out the sentiment using gold glitter paper and then added coordinating sequin colors for added interest.

Here is a close up of the details:


This was another super quick and easy card and I love how it turned out! I am also submitting it to this week's Simon Says Stamp Wednesday Challenge, where the theme is Anything Goes.

That is all for today!  I appreciate you taking the time to stop by!

Until next time...
 photo Signature_zps1df7bf72.png

Wednesday, August 27, 2014

Runway Inspired Challenge #66

Good morning, everyone!  Today I am participating in this week's Runway Inspired Challenge.  Here is the inspiration photo:
http://www.runwayinspired.blogspot.com/2014/08/ric66-sportmax.html


 And here is the card I made:


I was inspired by the bursts of color and the white (or blue) space.  I stamped this flower in the red and pink distress inks and then used my water brush to color them in with the same colors.  I stamped the sentiment and some little flowers in navy blue, then added some dark, glittery enamel dots to finish it off.  I am happy with the way it turned out.

I am also submitting this for this week's Simon Says Stamp Wednesday Challenge.  The theme is Anything Goes!

That is all I have for today, folks!  I'll probably be playing along with more soon, so stay tuned!

Until next time...
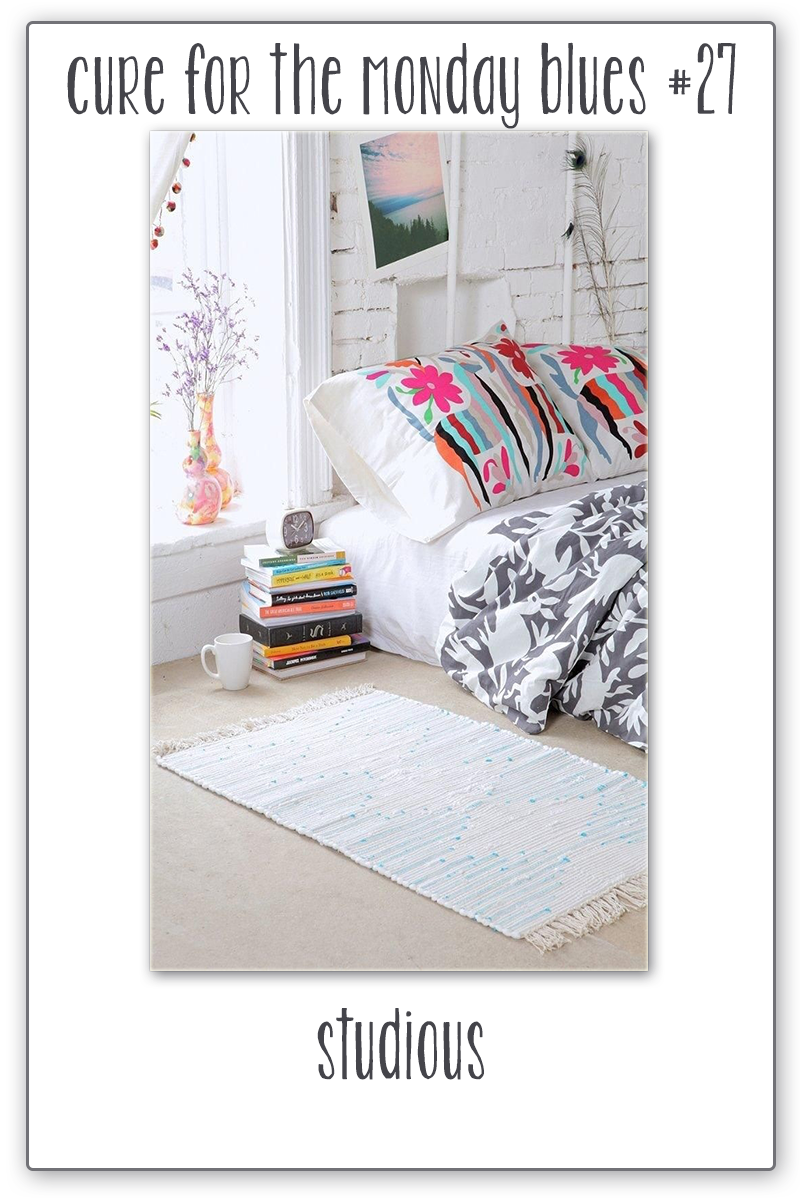
 photo Signature_zps1df7bf72.png

Tuesday, August 26, 2014

One More, For Good Luck!

Hello!  I am back with the third card I made using this week's CAS(E) this Sketch challenge sketch.  Here is the sketch again:

http://casethissketch.blogspot.com/2014/08/case-this-sketch-89.html

And here is the card I made, also using this week's Avery Elle AEIHeartU Challenge theme of sequins:

http://aeiheartuchallenge.blogspot.com/2014/08/aeiu-challenge-14sequins.html

I love this fun, colorful card!  I applied Picked Raspberry and Peacock Feathers distress ink to one of my stamp blocks, then misted on some water.  This makes the block kind of like one big solid stamp.  I applied the block to the card a couple times, which allowed the ink to make a solid stamped area.  I love the colors that the ink made in the middle.  I used some sequins that were very similarly colored and applied them in the areas that matched their color.  I just love how it all turned out.  Clean and simple and colorful!

That is all for today!  I hope you have enjoyed seeing the very different cards I made using the same sketch! 

Until next time...
 photo Signature_zps1df7bf72.png

Monday, August 25, 2014

Same Sketch, Different Day

Happy Monday, all!  Today I am back with another card I made using this week's CAS(E) this Sketch challenge sketch. 

Here is the sketch again:

http://casethissketch.blogspot.com/2014/08/case-this-sketch-89.html


I also used the photo prompt for this week's Card Concept challenge.  Here's the photo:

http://thecardconcept.blogspot.ca/2014/08/challenge-17-be-inspired.html


Here is the card I made:

This card looked a bit different in my head, but I still think it turned out nice.  I wanted to go clean and simple for it, since the bedding in the picture was so crisp and clean looking.  I made a stencil with my Silhouette, then used Crushed Olive distress ink to color it in, directly on the card itself.  I also cut out a frame that was colored with the same color to put around the flower.  Then I stamped the sentiment on a Paper Smooches banner and that was it.  Very quick and easy.  My kind of card!

That's it for today!  I have one more card to show you tomorrow.  Have a wonderful day!

Until next time...

 photo Signature_zps1df7bf72.png

Sunday, August 24, 2014

I Heart Sketches

Hello!  This weekend I have been having fun playing with the sketch for this week's CAS(E) this Sketch challenge, so I wanted to share one of the cards I made.  I'll share the others in the next couple days. 

First off, here is the sketch:

http://casethissketch.blogspot.com/2014/08/case-this-sketch-89.html

And here is the card that I created, keeping in mind this week's AEIHeartU Challenge theme of sequins:


First, I masked off the rectangle and then stamped the background using one of the stamps from Avery Elle's Woodgrain & More stamp set.  This card was the first time that I attempted to make a double die cut piece.  I started by die cutting the goose, making sure to keep the edge of the die by the feet hanging off the block.  So when it was cut out, the rest of the body was cut but the area below the feet was still attached to the paper.  Then I took my Paper Smooches banner die and did the same thing, making sure to keep the area by the feet hanging off the edge again.  It turned out a bit wonky, so I had to trim the banner a bit to make it look right, but I think it turned out pretty cool.

Here is a close up of what I am talking about:

 
I realize now that it is hard to see, but the goose is attached to the banner right behind it's heel.  Next time I'll make one that is a bit more obvious.  :)

That is all I have for today!  I'll be back tomorrow with another card I made with this sketch.  Thanks for stopping by! 

Until next time...
 photo Signature_zps1df7bf72.png

Wednesday, August 20, 2014

ColourQ #255

Hello, hello!  I hope you all are having a great week!  Today I am playing along with a challenge I recently stumbled upon.  It is a color challenge called ColorQ.

Here is the color pallet:

http://colourq.blogspot.com/2014/08/colourq-challenge-255.html

And here is the card I made:


I didn't have the Rich Razzleberry color, but the color I used (Memories Dye Ink in Port Red) was very similar...until I got it wet and it turned a more pinkish color.  Oh well, I tried!  I cut the tag with my Silhouette and then used a mask over it when I added the color.  Once I was done, I sprayed the tag with water to allow the colors to move a bit.  When it was dry, I heat embossed it using Versamark and silver embossing powder.  I added the grommet and seam binding, which I had dyed with the Port Red, then added the silver sequins for a finishing touch.  I think it turned out pretty.  Seam binding has a way of making things pretty all by itself.  :)

That is all for today!  Thanks for stopping by!

Until next time...
 photo Signature_zps1df7bf72.png

Tuesday, August 19, 2014

A Brightly Colored Thank You Card

Hello, again!  Today I am playing along with two fun challenges and I wanted to share the card I created!  I am using photo inspirations from The Cutting Edge Challenge and the Cure for the Monday Blues challenge.  Here are the photos:


http://littlemisst-papercraft.blogspot.com/2014/08/cure-for-monday-blues-challenge-27_18.htmlhttp://thecuttingedgechallenge.blogspot.com/2014/08/the-cutting-edge-challenge-8.html

I decided to use the fun floral and greenery from the Cutting Edge picture with the colors from the Cure for the Monday Blues picture.  Here is the result:


I started off by stamping the background with grey ink, mimicking the comforter of the Monday Blues picture.  Then I used my Silhouette to cut out the floral shape out of black glittered cardstock.  I ran the shape through my Xyron sticker maker so I could make sure when I watercolored the image, the colors wouldn't bleed through.  Next, I used my watercolor pencils to color the image, then went over it all with a water brush.  Backing it all with a black cardstock base just made the colors pop even more.  I think it's so vibrant and pretty!

That is all for today!  Thanks again for stopping by!

Until next time...
 photo Signature_zps1df7bf72.png

Monday, August 18, 2014

CAS(E) this Sketch #88

Good Morning, everyone!  Hope you all are gearing up for a great week!  We are on week #2 school for the biggie and counting down the weeks until the little goes back to school.  We had summer break, right?  It went by so fast, I just wanted to make sure I didn't actually miss it.  :)

Anyway, I am back today with a card I made for this week's CAS(E) this Sketch challenge.  Here is the sketch:

http://casethissketch.blogspot.com/2014/08/case-this-sketch-88.html

And here is the card I made:


I found this fun scribble shape in the Silhouette store and decided to use it to make flowers with.  I used the offset feature to give the scribbles a solid background of the same size, then watercolored all six shapes separately.  I love how they turned out.  I did some random green shapes behind them to create the look of greenery.  I stamped the WPlus9 sentiment with Versamark and embossed it with silver embossing powder.  I just love how it all turned out!

That is all I have for today!  Thanks for stopping by!

Until next time...
 photo Signature_zps1df7bf72.png

Sunday, August 17, 2014

Little Tangles Challenge #42

Hello again!  I hope everyone is having a wonderful weekend!  I am back today with a card I made for this week's Little Tangles Challenge


Here is the card I made:


I. Love. This card!  I used a stencil I made with my Silhouette and applied Worn Lipstick and Peacock Feathers distress ink in varying shades.  It looks like confetti falling from the sky.  So fun!  Next, I 2nd generation stamped the balloons, cut them out, then covered them with glossy accents.  Seriously.  Glossy accents takes forever to dry!!  The last time I used it (some three or so years ago), I was an avid scrapbooker and it took me hours to complete one layout.  So I could apply it at the beginning of the project and be done with it at the end.  Now that I prefer card making, I was SO antsy waiting for these balloons to dry.  It killed me that I had to leave them overnight to dry (I was making this at 10pm).  That might seem so bizarre, but I make cards because they are quick and (mostly) brainless.  Scrapbook layouts gave me headaches.  Cards clear my head.  Glossy Accents is of the devil.  Just kidding.  But man, doesn't it make those balloons shine??


I love how this card turned out.  I stamped the sentiment using some seriously yummy silver embossing powder that I found at my local stamp shop.  This stuff melts like butter and it is SO shiny!  This picture doesn't do it justice at all. 

That is it for today!  I am so glad you stopped by to take a look!

Until next time...
 photo Signature_zps1df7bf72.png

Saturday, August 16, 2014

Paper Smooches Sparks Challenge

Happy Saturday!  Today I am playing along with this week's Paper Smooches Sparks Challenge.  Here is the inspirational photo:

http://papersmoochessparks.blogspot.com/2014/08/august-10-16-picture-perfect-challenge.html

And here is the card I created:


I was inspired, quite literally, by the washi-decorated jars holding paint brushes.  I started by stamping two paint brushes and watercoloring them in with the same color ink I stamped them in.  Then I stamped the mason jar on some vellum, put some washi tape across it, then cut it all out as one piece.  I added some pink and natural burlap twine to finish the jar off.  I love the simplicity of this card.  I'll save it for one of my artsy friends.  :)

That is all for today!  I'll be back tomorrow with another card that I recently made.  Thanks for stopping by!

Until next time...
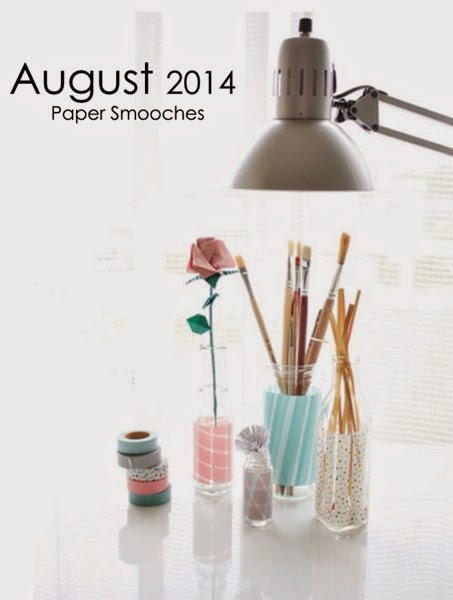
 photo Signature_zps1df7bf72.png

Monday, August 11, 2014

AEIHeartU Challenge #13: Kraft

Hello, all!  I sit here in utter disbelief that my biggies goes back to school tomorrow...and that she'll be starting 2nd grade!  Where does the time go?! 

I thought I'd share a card I made for this week's Avery Elle AEIHeartU Challenge.

http://aeiheartuchallenge.blogspot.com/2014/08/aeiu-challenge-13kraft.html

Here is the card I made:


I used Avery Elle's Thanks A Bunch stamp set with Distress Inks.  The pinks just kind of pop off the page, don't they?  I wanted to keep with the natural look of the watercolor paper, so I backed it with a Kraft cardstock.  I love how it turned out. 

That is it for now!  Thanks for stopping by!

Until next time...
 photo Signature_zps1df7bf72.png

Saturday, August 9, 2014

Paper Smooches Sparks Challenge: Anything Goes

http://papersmoochessparks.blogspot.com/2014/08/august-3-9-anything-goes-wk1-challenge.html

Happy Saturday, Friends!  Today I am playing along with this week's Paper Smooches Sparks Challenge .  I used the sketch from this week's Retro Sketches.  Here is the sketch:

http://www.retrosketches.blogspot.com/2014/08/retrosketches-126.html

And here is the card I made:


I thought I'd go the non-floral route this time and get a head start on my teacher cards for this year.  This card is simple and to the point.  My favorite kind of card.  :)
 
That's it for today!  Have a great weekend!

Until next time...

 photo Signature_zps1df7bf72.png

Friday, August 8, 2014

Color Throwdown #304

Hello!  So I dropped the ball on participating in more challenges last week.  My girls and I traveled with my parents to a small town in Wyoming for a family reunion last weekend
.  I got busy with laundry and packing and - much to my dismay - finding out there was a family of mice living in the basement.  ::shudder::  Luckily for me, my hubby dealt with the latter while we were gone.  So anyway, I'm back and ready to post again! 

Today I am participating in this week's Color Throwdown challenge.  Here is the color swatch:

http://colorthrowdown.blogspot.com/2014/08/color-throwdown-304.html

I love these fun, vibrant colors.  They are similar to the challenge I participated in here.  Here is the card I made:


The papers from Fancy Pants' Off to School collection worked so well with these colors, so I decided to make a card for my biggie's teacher.  The bottom sentiment was stamped in Bermuda Bay and stamped the chalk with the Smoky Slate color.  I stamped and colored the apple with the Bermuda Bay and Real Red colors.  Unfortunately, when I brushed on the clear Wink of Stella, the red lightened up a lot.  I'm not sure why my Wink of Stella pen doesn't like me anymore.  It doesn't seem to work the way it used too.  :(  Anyway, I used some sequins to bring out the colors even more and to finish it all off. 

I am linking this up to the Simon Says Stamp Wednesday Challenge, where the theme is Make It Sparkle.  Here is a close up of the hard-to-see glitter on the apple:


That's all for today!  Thanks for stopping by!  Until next time...
 photo Signature_zps1df7bf72.png