Friday, November 1, 2013

Kiwi Lane Blog Hop!


Happy Friday, everyone!  Today I am excited to be participating in the November Kiwi Lane Blog Hop!  I have always enjoyed these hops as a follower because I love seeing all the amazing things that can be made using Kiwi Lane's designer templates.  Now I get to show you what I made with mine! 

Make sure to leave a comment at the end of this post because one random winner chosen from one of the participating blogs (including the Kiwi Lane blog), will be given a $25 gift certificate to the Kiwi Lane Shop!!  The winner will be announced on the Kiwi Lane blog on Thursday, November 7th.  Here is the blog lineup in case you get lost or this is the first you're hearing of the hop:

** Cristine Redmond ** You Are Here!

Now that all of the technical stuff is out of the way, let's get this project reveal started!  I was given the Nature template set to work with: 


Being that fall is in full swing in my neighborhood, I was immediately drawn to the two leaf templates in this set.  I thought it would be fun to put together a wreath for my front door. 
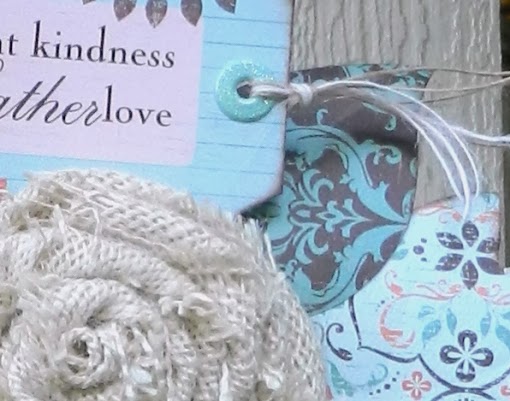


Here are the supplies I used:
- wreath (mine was a straw wreath)
- burlap (can be ribbon or fabric cut into strips)
- Kiwi Lane Nature set
- Patterned Paper
- additional embellishments as needed
- glue gun
- a bone folder if it has a rounded edge and a straight edge, or a spoon & knife
- mouse pad or other soft surface

Here is the wreath that I created:


First I wrapped the wreath using burlap ribbon with a frayed edge to give the wreath a bit of visual interest.  Then I used the templates to cut out leaves from various papers from Authentique's Gathering collection.  I wanted to make these leaves look like more than just paper, so I flipped my leaves over to the side I wasn't going to be showing and used the rounded side of my bone folder in a circular motion to make the edges of the leaves curl up.  Then I flipped the leaves over and used the straight edge of my bone folder to create lines to look like the veins in the leaves.  Sounds complicated, but it was super quick and easy and gave the leaves so much more dimension (it's hard to see from the pictures).   


I used some lighter colored burlap fabric to make the rosettes, using my glue gun to keep them together and then to adhere them to the wreath.  What is the saying?  "I craft, therefore I have no fingerprints."  Yeah, that was me last weekend.  :)


I added a couple extra leaves and another rosette to the top of the wreath to balance out the heaviness of the other side.

I am SO HAPPY with the way this wreath turned out! As a self-proclaimed "novice," I've always wanted to make a pretty wreath but have always thought it would be too hard.  This came together so quickly and easily and I am so proud to have it hanging on my front door now.

Thank you so much for hopping by!  Don't forget to leave a comment to be entered in the drawing for a $25 gift certificate to the Kiwi Lane Gift Shop!!  Now hop on over to Joy Nielson's blog to see the amazing project she created!

Until next time,

Photobucket


Wednesday, October 9, 2013

We R Memory Keepers Bewitched

Happy Wednesday, everyone!  I am so thrilled to be guest designing over at the We R Memory Keepers blog today!  I was lucky to be chosen to work with their new Bewitched collection.  Head over to their blog to see one of the projects I created.  Because they were super generous and sent me a lot of goodies to play with, I thought I would share the rest of the fun stuff I made. 

First up, the layouts:


And here are a few cards I made with the scraps:


Thank you for stopping by today!  Until next time...


Photobucket

Happy Fall Y'all!

I don't know about you, but I love fall.  The crispness of the air, the smells of leaves and fireplaces burning and the pretty colors that go with it are all wonderful.  Growing up in Arizona, fall came when the temperatures hit 80 degrees.  Fall is quite different now that I live in Kansas.  :)

In September, Sweet Stamp Shop released a great fall themed stamp set called Fall Gratitude and I wanted to share a couple cards that I made with it. 

First up is this card:


I used stamping markers to color in different areas of this great feather stamp and created a scheme that I am in love with.  I added the simple sentiment, some seam binding and burlap twine and this simple card is now in my top 5 favorite cards.

Here is another card I have made with this set:


I stamped the circlular stamps on watercolor paper and then smeared them a bit with my water brush.  I used a coordinating ink refill to dye some seam binding, then tied it on with a piece of dark brown burlap twine.  I love this wood grain patterned paper from Basic Grey's Life of the Party collection.  This card reminds me of fall in the mountains of Colorado.  Nothing beats the gorgeous colors of the Aspen's when they are changing colors.

That is all for now!  I'll be back soon with more!

Until next time...


Photobucket

Sunday, October 6, 2013

World Card Making Day 2013


Happy (day after) World Card Making Day!  I was able to squeeze in some crafty time yesterday to make a couple cards that I wanted to share with you.  Coincidentally, yesterday was also my husband's birthday, so I decided to put an end to my procrastination to make him a birthday card.  And because I love using my Pinterest pins for inspiration, here is a card I pinned from Kristina Werner that I used as my starting point:


And here is the card I made:


I used My Mind's Eye's Cut & Paste Adorbs collection for this masculine card.  I LOVE how the inspiration card used wood grain cardstock.  I happened to have a sheet lying around that I was too nervous to mess up use, so I took the plunge and used it for the base of my card.  I also used a wood grain patterned paper from the Adorbs 6x6 paper pad to complement it.  


I stamped the banner and sentiment on the coordinating ombre paper with Versamark and embossed it with white embossing powder.  It really makes the sentiment pop off the paper.  A few extra coordinating touches and this card was done!  I love quick and easy cards!

The second card I made is for this week's 10 Minute Craft Dash challenge.  Here is the color scheme:


And here is the card I made:


I used my Silhouette to create a custom patterned paper and I am so thrilled with the outcome!  I used a silver sketch pen to sketch out the spider webs then used the blade to have it and the little bat cut out for me.  I LOVE when an idea in my head comes out the way I planned.  :) 


I stamped the speech bubble with Versamark and covered it with silver embossing powder to go with the silvery shimmer of the spider webs.  I threw on a few other challenge-coordinating accents as well as a silver glitter enamel dot and this was done.  I have to say for as complicated as this card was, I did it FAST!  I had 1 minute and 42.351 seconds left when I finished.  :) 

I hope you all had a wonderfully crafty day yesterday and are enjoying your weekend.  I will be back soon with some fall-inspired cards.

Until next time...


Photobucket

Saturday, August 17, 2013

10 Minute Craft Dash


This was the first time I had ever participated in a 10 Minute Craft Dash challenge, but I had so much fun with it!  I'll tell you what...when that timer is ticking away, it takes all of the second-guessing out of the equation.  You either do it or you don't.  And at 11:00pm, that's about all I could offer anyway.  :) 

Here are the supplies I threw together:


And here is the card I created:


The picture isn't great because I had to take it with my tablet at my craft table (hubby was on the computer at the time), but I'll retake it in the morning.  I love how this turned out.  I used a TON of Sweet Stamp Shop stamps to create the sentiment and papers from My Mind's Eye Adorbs collection (LOVE that line!!).  Threw on some embellishments and BAM!  Done!

Check out my time:    


Seriously.  And about half a second before this, my glue exploded all over the arrow wood veneer I was using.  ALL OVER.  I just smeared some off and placed it, then hit the timer to turn it off...glue still covering most of my finger tips.  It was MADNESS!  I audibly sighed when I was done and my husband thought something was wrong.  lol  I was just excited that it worked out right at the very. last. millisecond.  :)

Thanks for stopping by to see my creation!  Until next time...

Photobucket

Monday, August 5, 2013

It's Winner Time!

Happy Monday everyone!  Hope you all had a great weekend.  Mine was spent decompressing at the lake, but now it's definitely a Monday and I have a "to-do" list to prove it.  :)

I wanted to pop in to post the winner from the giveaway on my blog!  Congrats Amie Lamm-Griffin!  Your comment was randomly chosen to receive the ATC collection!  Email me at onescrappynovice at yahoo dot com with your address and I will get them in the mail to you ASAP!


Thank you for hopping with me this weekend!  Have a great week!

Photobucket

Friday, August 2, 2013

Scrapbook Steals Blog Hop Time!


Happy Friday!  Hope you're having fun while hopping along on the Scrapbooksteals.com blog hop!  You should have come to me via Abbey Colbert's blog, but if you didn't, head over to ScrapbookSteals' blog to get started!  Here's the blog roll if you get lost along the way:

Venetia Holbrook
Lisa Kitzke
Michelle Cunningham
Abbey Colbert
Cristine Redmond < - You are here!
Staci Jones

Today everyone on the hop is featuring 7 Gypsies Vintage ATCs.  These things are so versatile, as I am sure you are finding out from all of the talented ladies on the hop!  For my first project, I decided to use mine as a journaling section for a layout.  Here's the layout:


When I found this picture in my stash, I knew I wanted to tell the back story of it.  This picture was taken by my best friend, who had moved in with me while my husband was away on his first deployment to Iraq.  On the journaling card, I decided to write what I would have told the girl in the picture.  We were newly married with no kids, so it was hard to think past the deployment and imagine what our future together might look like.  Here's my journaling:
 
 
I also wanted to accent the page with some clouds because even though it was a very heavy time in our lives, it was filled with so much love.  Distance really did make the heart grow fonder in our case. 


For my second project, I decided to make a card, using one of the ATCs as part of the background.  This black ATC was perfect to do some chalkboard doodle art on and to make the washi pennants stand out a bit more.  


That is all for now!  Thank you for taking the time to stop by and check out my work!!  I would love to give away a sampling of the ATCs I used!  To enter, become a follower of my blog and leave me a comment telling me you did so.  This giveaway ends Sunday, August 4th at midnight CST.  I will draw a winner on Monday, August 5th! 

Now hop along over to the amazingly talented Staci Jones' blog! 

Until next time...


 Photobucket