Showing posts with label sequins. Show all posts

Monday, March 16, 2015

Paper Girls Challenge #76 - Shakers!

Good morning, everyone!  Today I am up on the Paper Girls Challenge blog with my very first post!  The theme this go-round is shaker cards.  If you have followed me at all, you know that I am completely digging this trend.  You can see other examples here, here and here.

Intimidate by shaker cards?  I was, too, until I saw a video on how easy they are.  I thought I would do a quick tutorial on how to put one together.  Here we go!

Here are the supplies you'll need:   


I did some stamping and pre-cutting, but you get the general idea of what you need. I used a piece of acetate for the window, but you can use any kind of clear plastic or even vellum. Don't have sequins?  Try using small die cut shapes and/or coarse glitter!

First I adhered the piece of acetate to the back of the window piece: 


Then I flipped it over and attached the frame and die cuts:


Next, I flipped it back over and attached the foam adhesive.  You can use whatever you have.  Foam squares work but just make sure to line them up right next to each other so the tiny bits don't fly out when you shake the card.  (This is why I didn't suggest fine glitter above.  I used foam squares and glitter together and the glitter still managed to seep out, even though I thought I had them close enough together.) 


For the final step, just add your sequins, beads, etc, remove the backing from the foam tape, and then stick the card base on top.  SUPER EASY!!


Here is the final product:


I hope this inspires you to play along with the Paper Girls challenge this round!  I can't wait to see what you create!

Until next time...
 photo Signature_zps1df7bf72.png

Monday, February 2, 2015

Paper Girls Challenge #73 : Love/Anniversary

Good Morning, friends!  Today I am back with another Paper Girls Challenge!  This week's theme is Love/Anniversary.  Good timing, with Valentine's Day coming, don't you think?  :)  Here is the card I made:


And here is a close up:


First, I stamped a frame from Paper Smooches' Flirty Frames set using Versamark, then I used clear embossing powder to set it.  Next, I wet the entire frame area using a clean brush and water, then dabbed different colors of pink watercolors around the frame.  Once it was dry, I die cut out the frame, then backed it with some acetate.  I surrounded the acetate with foam tape to make it a shaker card.  I used a scrap piece of watercolor paper and used more pink watercolors to color the entire area.  Once that was dry, I used my Mama Elephant Confetti Creative Cuts die to cut out a bunch of hearts.  To the hearts, I added some different colored pink sequins and some clear glass beads.  The sentiment if from Paper Smooches' Good Gabs set.

I love how this card turned out.  Simple, pretty, and fun!  I am also submitting this card for this week's Paper Smooches Sparks Challenge where the theme is Anything Goes!

http://papersmoochessparks.blogspot.com/2015/02/february-1-7-anything-goes-wk1-challenge.html

Thanks for stopping by!  Until next time...
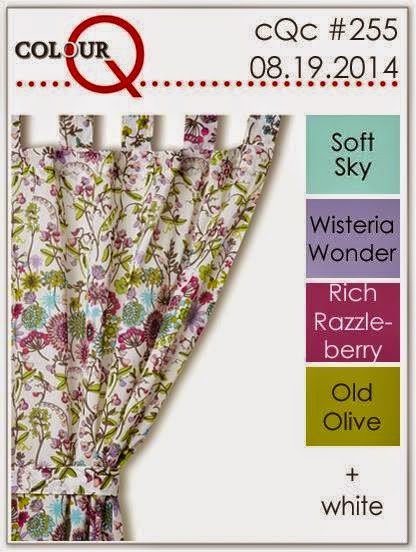
 photo Signature_zps1df7bf72.png

Friday, January 2, 2015

CAS-ual Fridays Challenge 135


Long time no see, friends!!  I have severely neglected my blog the past few months but that will change...today is my first post as a DT member for the CAS-ual Fridays Challenge blog!  We are all ready for our first challenge of 2015 and I am excited to show you all what I have been up to.  Here is the first challenge:

http://cas-ualfridays.blogspot.com/


And here is what I cooked up:


You will have to excuse the super crummy picture.  In the last month, we have only had about 10 days with sunlight.  It's been very bizarre...I'm not even in Seattle!  ;)

Anyway, for this card I used the Four Petal Set Fri-Dies and a sentiment from the Beanstalks set.  First, I stamped the sentiment.  Then once I cut the flowers out, I popped black brads through the centers and then used glue dots to adhere them to the card.  Then I placed some black sequins around them using Glossy Accents. 

That is all for today!  I hope you will all come over to play with us this month! 

Until next time...
 photo Signature_zps1df7bf72.png

Sunday, September 21, 2014

Pretty, More Like GORGEOUS, Peonies

Guys.  I'm in love.  Have you seen Wplus9's new set called Pretty Peonies?  It. Is. Gorgeous!!  I really love their Fresh Cut Florals set, too.  They just make the BEST layering stamps. I recently got some pretty new pink ink pads that I was dying to try out with these stamps. 

I was completely inspired by this card by Joni Andaya:


I loved the grouping of the flowers on one side and the sentiment on the other.  This is what I came up with:


My flowers aren't as full and interesting as Joni's but I still think they turned out SO beautifully.  I stamped the base of the flowers in a very light pink, then second-generation stamped the details with a darker pink color.  (The sentiment is first generation of the same color, to give you an idea of the difference between the first/second generations.) 


I finished the card off with some pink sequins from Avery Elle and some crystal clear sequins from Neat and Tangled.  For my first time playing with this set, I couldn't be more thrilled with the way the card turned out!

That's all for today!  I'll be back soon!

Until then...
 photo Signature_zps1df7bf72.png

Saturday, September 20, 2014

You Win Some, You Lose Some...

Wow, it's been a bit, huh?  I guess I was in a bit of a creative slump for a while and didn't feel the urge to create anything lately.  Don't worry, though.  I've turned the corner and am back at my table, creating away.  :) 

I thought I would share a couple cards that I made and submitted for publishing that weren't picked up.  I'll be honest, I don't submit my cards too often.  But when I do, I am usually very lucky and get picked up.  (Compared to the many, many layouts that I submitted in the past that weren't picked up.)  I really loved the two cards that I submitted, so I wanted to put them out there "on the computer" as my girls say. 

Here is the first card:


For this card, I created a stencil using my Cameo and acetate paper.  Then I used some embossing paste and mixed it with some Black Soot distress ink.  I had originally wanted it to be a black background, but I was happy with the color that it turned out to be.  I spread the embossing paste all over the card, then sprinkled a bit of glitter over it before I removed the stencil.  I removed the stencil and let it dry, then stamped the simple sentiment and mounted it on a think strip of colored cardstock.  I added three enamel dots to add more visual interest and that was it.  I think it turned out beautifully. 

Here is the second card:


For this card, I created my own overlay with my Cameo and cut it out in cardstock.  Then I used my distress inks in Picked Raspberry and Peacock Feathers to create the fun color pattern.  I then took a thin paint brush and lightly flicked water onto the overlay.  I knew I was going to make this a shaker card, so when the overlay was dry, I traced the circles onto the card base so I would know where the holes would be, then I stamped the fun confetti background and sentiment into the openings.  I used some acetate and foam tape to make the shaker windows, then added the sequins and adhered the overlay to the top of the card.  I. LOVE. how this turned out.  The sentiment was heat embossed with my delicious silver embossing powder.  It's just a fun, shiny, happy card. 

That's all I have for today!  Thanks for stopping by.  :)  I'll be back tomorrow with a card/stamp set that is sure to keep me out of a creative rut for a while.  :)

Until then...
 photo Signature_zps1df7bf72.png

Thursday, August 28, 2014

A Rainbow of Thanks

This week Winnie and Walter stamps and Simon Says Stamp are working together and throwing out some challenges in the process.  I am playing along with one today, with the theme of using a rainbow color palette.  I have been a fan of Winnie and Walter stamps since I stumbled upon them, but I have yet to get my hands on any of them yet.  I am so glad that they have cut files that go along with their stamps so I can still play along!

Here is the card that I made: 


I created a stencil using my Silhouette and then filled it in using Distress Inks.  I cut out the sentiment using gold glitter paper and then added coordinating sequin colors for added interest.

Here is a close up of the details:


This was another super quick and easy card and I love how it turned out! I am also submitting it to this week's Simon Says Stamp Wednesday Challenge, where the theme is Anything Goes.

That is all for today!  I appreciate you taking the time to stop by!

Until next time...
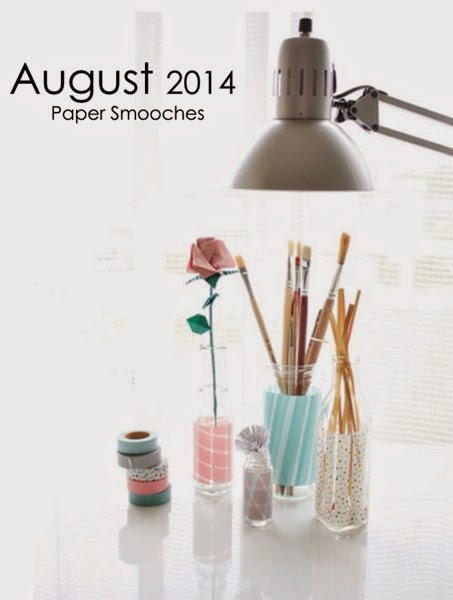
 photo Signature_zps1df7bf72.png

Tuesday, August 26, 2014

One More, For Good Luck!

Hello!  I am back with the third card I made using this week's CAS(E) this Sketch challenge sketch.  Here is the sketch again:

http://casethissketch.blogspot.com/2014/08/case-this-sketch-89.html

And here is the card I made, also using this week's Avery Elle AEIHeartU Challenge theme of sequins:

http://aeiheartuchallenge.blogspot.com/2014/08/aeiu-challenge-14sequins.html

I love this fun, colorful card!  I applied Picked Raspberry and Peacock Feathers distress ink to one of my stamp blocks, then misted on some water.  This makes the block kind of like one big solid stamp.  I applied the block to the card a couple times, which allowed the ink to make a solid stamped area.  I love the colors that the ink made in the middle.  I used some sequins that were very similarly colored and applied them in the areas that matched their color.  I just love how it all turned out.  Clean and simple and colorful!

That is all for today!  I hope you have enjoyed seeing the very different cards I made using the same sketch! 

Until next time...
 photo Signature_zps1df7bf72.png

Sunday, August 24, 2014

I Heart Sketches

Hello!  This weekend I have been having fun playing with the sketch for this week's CAS(E) this Sketch challenge, so I wanted to share one of the cards I made.  I'll share the others in the next couple days. 

First off, here is the sketch:

http://casethissketch.blogspot.com/2014/08/case-this-sketch-89.html

And here is the card that I created, keeping in mind this week's AEIHeartU Challenge theme of sequins:


First, I masked off the rectangle and then stamped the background using one of the stamps from Avery Elle's Woodgrain & More stamp set.  This card was the first time that I attempted to make a double die cut piece.  I started by die cutting the goose, making sure to keep the edge of the die by the feet hanging off the block.  So when it was cut out, the rest of the body was cut but the area below the feet was still attached to the paper.  Then I took my Paper Smooches banner die and did the same thing, making sure to keep the area by the feet hanging off the edge again.  It turned out a bit wonky, so I had to trim the banner a bit to make it look right, but I think it turned out pretty cool.

Here is a close up of what I am talking about:

 
I realize now that it is hard to see, but the goose is attached to the banner right behind it's heel.  Next time I'll make one that is a bit more obvious.  :)

That is all I have for today!  I'll be back tomorrow with another card I made with this sketch.  Thanks for stopping by! 

Until next time...
 photo Signature_zps1df7bf72.png

Wednesday, August 20, 2014

ColourQ #255

Hello, hello!  I hope you all are having a great week!  Today I am playing along with a challenge I recently stumbled upon.  It is a color challenge called ColorQ.

Here is the color pallet:

http://colourq.blogspot.com/2014/08/colourq-challenge-255.html

And here is the card I made:


I didn't have the Rich Razzleberry color, but the color I used (Memories Dye Ink in Port Red) was very similar...until I got it wet and it turned a more pinkish color.  Oh well, I tried!  I cut the tag with my Silhouette and then used a mask over it when I added the color.  Once I was done, I sprayed the tag with water to allow the colors to move a bit.  When it was dry, I heat embossed it using Versamark and silver embossing powder.  I added the grommet and seam binding, which I had dyed with the Port Red, then added the silver sequins for a finishing touch.  I think it turned out pretty.  Seam binding has a way of making things pretty all by itself.  :)

That is all for today!  Thanks for stopping by!

Until next time...
 photo Signature_zps1df7bf72.png

Saturday, August 16, 2014

Paper Smooches Sparks Challenge

Happy Saturday!  Today I am playing along with this week's Paper Smooches Sparks Challenge.  Here is the inspirational photo:

http://papersmoochessparks.blogspot.com/2014/08/august-10-16-picture-perfect-challenge.html

And here is the card I created:


I was inspired, quite literally, by the washi-decorated jars holding paint brushes.  I started by stamping two paint brushes and watercoloring them in with the same color ink I stamped them in.  Then I stamped the mason jar on some vellum, put some washi tape across it, then cut it all out as one piece.  I added some pink and natural burlap twine to finish the jar off.  I love the simplicity of this card.  I'll save it for one of my artsy friends.  :)

That is all for today!  I'll be back tomorrow with another card that I recently made.  Thanks for stopping by!

Until next time...
 photo Signature_zps1df7bf72.png

Friday, August 8, 2014

Color Throwdown #304

Hello!  So I dropped the ball on participating in more challenges last week.  My girls and I traveled with my parents to a small town in Wyoming for a family reunion last weekend
.  I got busy with laundry and packing and - much to my dismay - finding out there was a family of mice living in the basement.  ::shudder::  Luckily for me, my hubby dealt with the latter while we were gone.  So anyway, I'm back and ready to post again! 

Today I am participating in this week's Color Throwdown challenge.  Here is the color swatch:

http://colorthrowdown.blogspot.com/2014/08/color-throwdown-304.html

I love these fun, vibrant colors.  They are similar to the challenge I participated in here.  Here is the card I made:


The papers from Fancy Pants' Off to School collection worked so well with these colors, so I decided to make a card for my biggie's teacher.  The bottom sentiment was stamped in Bermuda Bay and stamped the chalk with the Smoky Slate color.  I stamped and colored the apple with the Bermuda Bay and Real Red colors.  Unfortunately, when I brushed on the clear Wink of Stella, the red lightened up a lot.  I'm not sure why my Wink of Stella pen doesn't like me anymore.  It doesn't seem to work the way it used too.  :(  Anyway, I used some sequins to bring out the colors even more and to finish it all off. 

I am linking this up to the Simon Says Stamp Wednesday Challenge, where the theme is Make It Sparkle.  Here is a close up of the hard-to-see glitter on the apple:


That's all for today!  Thanks for stopping by!  Until next time...
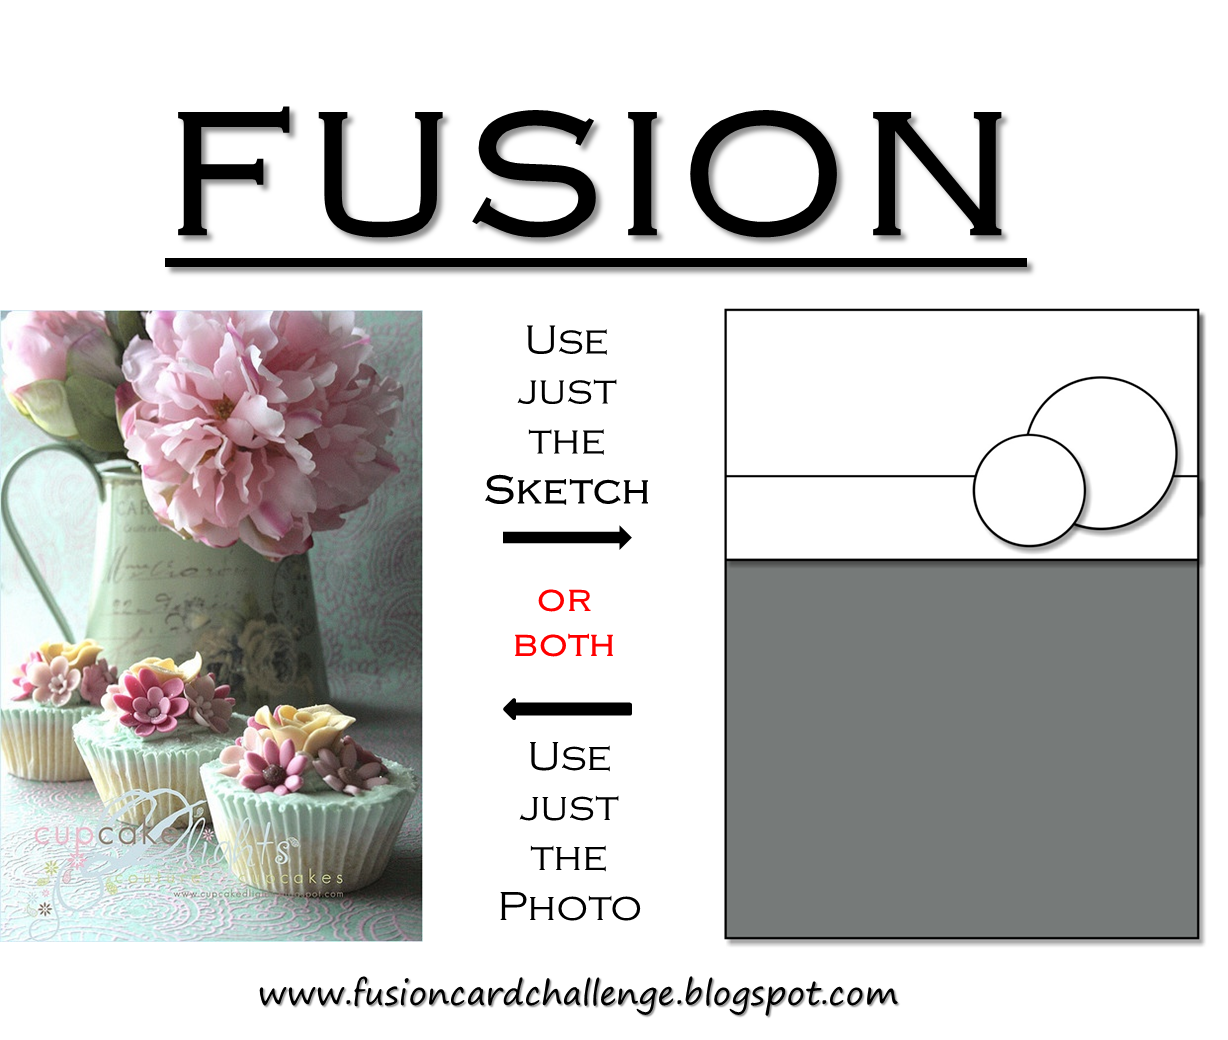
 photo Signature_zps1df7bf72.png

Thursday, July 24, 2014

Fusion Card Challenge

Hello!  My girls have been at a day camp all week, so I am getting some serious card making done!  Today I am back with a card that I created for this week's Fusion Card Challenge

Here is the GORGEOUS picture and the sketch for the week:

http://fusioncardchallenge.blogspot.com/2014/07/july-17th-french-cupcakes.html
Isn't that a beautiful picture?  I tried to do it some kind of justice with the card I made:


I wanted this card to be pretty, so I added the white sequins and the dyed seam binding to finish it off.  I love how it turned out!  Doesn't seam binding just make everything pretty?  :)

While I am here, I wanted to share another card I made for some friends of ours who just bought a new house.


I used my Silhouette to cut out the stamp-edged background, house and heart.  The stamps are all from Avery Elle.  It's a simple card, but sometimes those are the best kind.  I hope our friends like it.

That's all for today!  Until next time...


Wednesday, July 23, 2014

Mama Elephant and Me Challenge

Happy half-way point!  Today I am back with a card that I created for the Mama Elephant and Me Challenge blog.  This is a new one for me, so I'm excited to be playing along! 

Here is the inspiration photo:

http://www.mamaelephantandme.blogspot.com/2014/06/a-new-challenge.html


And here is my card:


This card was a challenge for me, but I am happy with the way it turned out.  I am kind of loving the sequins here.  I didn't have any fun, orange sequins, so I took a small flower stamp, stamped it with orange ink, then covered it with a clear sequin.  That works just as well, if you ask me!

Here is a close up of the sequins:


That is all for today!  I'll be back tomorrow to share more.  Thanks for stopping by!

Until next time...
 photo Signature_zps1df7bf72.png

Tuesday, July 22, 2014

CAS(E) this Sketch #85

Hello!  Today I am back with a card I created for this week's CAS(E) this Sketch Challenge.  Here is the sketch:

http://casethissketch.blogspot.com/2014/07/case-this-sketch-85.html

And here is the card I made:


For this card, I used my Simon Says Stamp Favorite Flowers stamp set.  First, I stamped the base of the flower and leaves.  Then I took the coordinated scribble pieces and stamped them with Versamark.  I heat embossed them with white embossing powder.  I love how this look turned out.  The sentiment is from Avery Elle's Oh Happy Day set.  I added a bunch of pretty sequins to complement the flower.  I love how this card turned out! 

I am also submitting this card for this week's Simon Says Stamp Wednesday Challenge, where the theme is spots and dots.  

That is all for today!  Thanks for stopping by! 

Until next time...


 photo Signature_zps1df7bf72.png