Showing posts with label versamark. Show all posts

Monday, January 12, 2015

Runway Inspired Challenge #75

Happy Monday, everyone!  I've got a sickie home from school today so I thought I'd take some time to play with a challenge.  Today I am playing along with Runway Inspired Challenge #75.  Here is the inspiration photo:


And here is the card I made:


I was inspired by the bright pink fabric and the silver detail at the top of the dress.  First, I embossed this beautiful pattern using Versamark and my favorite silver embossing powder.  Then I stamped the sentiment onto the small strip of paper and then backed it with grey cardstock.  Next, I took a scrap piece of super thick cardstock and stamped it directly with Versamark and then covered it with the same embossing powder.  Then I die cut the "sparkle" sentiment and adhered it to the strip using Glossy Accents.

I am not one to be super flashy, so this card is very different for me, but I just love how this turned out.   

That is all for today!  Thanks for stopping by!

Until next time...
 photo Signature_zps1df7bf72.png

Sunday, August 31, 2014

Watercolor Blocks

Happy Sunday, everyone!  I hope everyone is having a wonderful long weekend!  Today I am playing along with Winnie and Walter's challenge for day 3 of their Share the Love week featuring Simon Says Stamp.  Today's challenge is to create a background using one stamp or one stamp set.  I used Simon Says Stamp's Favorite Flowers stamp set for this card.

Here is the card I made:


First, I die cut the rectangles using Pretty Pink Posh's Stitched Duo Dies 1 and Tim Holtz watercolor paper.  Then, I assembled all of the rectangles so they were side by side and taped them together on the back so the images would line up.  Next, I stamped the images using Versamark and then heat embossed them with some clear embossing powder that has glitter in it.  Next, I watercolored the images.  Once they were dry, I assembled the rectangles in spaced out strips on the card.  I used my Silhouette to cut out the Winnie and Walter sentiment from silver glitter paper to match the sparkle of the watercolor paper.  To finish it up, I threw on some enamel dots and I was done!  I think this card turnd out so pretty!  I don't always think of kraft paper being pretty, but with the florals and glitter all over it, it definitely fits the bill.  :)

Here is a close up of the glittery details:


I am going to submit this card for this week's Simon Says Stamp Wednesday Challenge, where the theme is Anything Goes.

Thanks for stopping by today!  I hope your weekend is wonderful!

Until next time...
 photo Signature_zps1df7bf72.png

Tuesday, July 15, 2014

AEIHeartU Challenge #11: One Word

 
Hello, All!  I am back after an eventful family trip at the lake and am getting back into the challenge game!  I feel like I am missing out if I am not playing along.  Am I the only one who feels that way? 

Tonight I am playing along with this week's Avery Elle AEIHeartU Challenge: 

http://aeiheartuchallenge.blogspot.com/2014/07/aeiu-challenge-11one-word.html

Here is the card I made: 


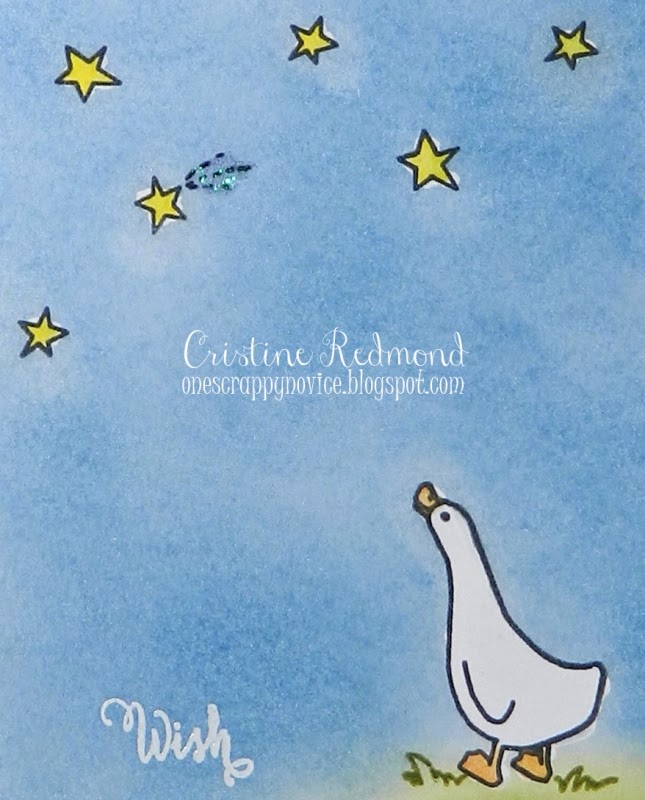
Guys, I am IN LOVE with this card!  It's not often that I finish a card and fall in love with it, but this one definitely did that for me.  I've been anxiously waiting for this Avery Elle Storybook stamp set to make it's way to me.  It's been sold out basically since it debuted.  But man was it worth the wait!

I started by masking off the edge of the white cardstock. Then I stamped the images where I wanted them.  Before I moved on, I stamped the sentiment with Versamark and heat embossed with clear embossing powder.  I wanted the sentiment to pop out from the background.  Then here's the secret next step:  I covered the stamped images with rubber cement!  I knew I didn't want to die cut the images, so covering them with the rubber cement was my next choice. Once the rubber cement was dry, I created the background with Distress Inks.  Seriously, why did I wait so long to jump on the Distress Ink bandwagon??  I rubbed off the rubber cement, colored the images with colored pencils, added some glitter glue to the shooting star, then adhered the whole thing to my card base. 

Here is a close up of what the masking did while I was applying the Distress Inks:

     
If you look closely, you can see where the rubber cement was applied outside of the stamped image line.  I just love it!

That is all for today!  Hope this card makes you as happy as it makes me.  :)

Until next time...


 photo Signature_zps1df7bf72.png

Tuesday, June 10, 2014

One Card, Three Ways, Four Challenges

There are SO MANY good challenges out in blog land this week.  I was inspired by the colors and sketches of the challenges listed within this post, so I decided to do something different (for me) and make similar cards with varying elements.

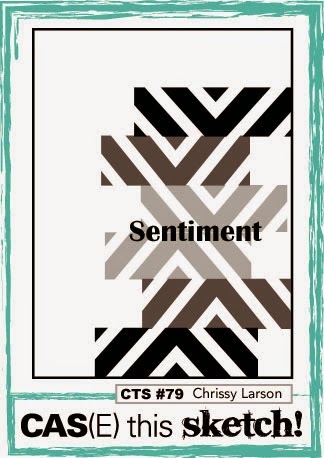
This first card was created for this week's CAS(E) this Sketch challenge!  Here is the sketch: 

http://casethissketch.blogspot.com/2014/06/case-this-sketch-79.html

I also used this week's Fusion Card Challenge color prompt as a starting point: 


Now that you've seen the inspiration pictures/sketches, here is the card I made:


I created a stencil with my Silhouette and used my distress inks to fill in the pattern.  I LOVE how it turned out!  I stamped a sentiment from Avery Elle's Aim High set in Versamark and used the most delicious embossing powder ever.  I picked it up from a local stamp shop and it's smooth and shiny.  So pretty! 


You can *kind of* see the shine in the second picture.  I've never seen embossing powder melt so smoothly before.  I'm in love!

For my second card, I used the same stencil and went off colors from Little Tangles' inspiration photo:

http://www.littletangles.blogspot.com/2014/06/challenge-38-inspiration-photo.html

http://www.littletangles.blogspot.com/2014/06/challenge-38-inspiration-photo.html

Here is the card I created:


I used more of a rainbow effect with this one, but only went through blue. I stamped a sentiment from Neat & Tangled's Just For You set on a round piece of cardstock and embossed it with the same yummy embossing powder from the first card.  


The shine shows up so much better in this picture!  LOVE!!

For my third card, I used this photo prompt from this week's Paper Smooches Sparks Challenge:

http://papersmoochessparks.blogspot.com/2014/06/june-8-14-picture-perfect-challenge.html

Instead of going straight across with the color, like I did in the last two cards, I added it at an angle.  I was able to fit more colors in this way.  I used a sentiment from Paper Smooches' Birthday Sampler set.  I decided to go simple with the sentiment because I didn't want too much to compete with the colors on this card.  I love how it turned out!


Thank you for stopping by today!  I will have more to share soon!  Until then...

 photo Signature_zps1df7bf72.png

Sunday, May 18, 2014

More Watercolor Cards!

http://onlinecardclasses.com/watercolor/


Today is the last official day of the Watercolor for Card Makers class.  Sad face.  But I have genuinely loved EVERY. SINGLE. DAY. of this class.  I've mentioned before that I am not an artist, but I am really good at faking it.  And watercoloring makes anything pretty, so that helps.  :)  I wanted to show you a few cards I made using techniques from three different days.

First up, here is a card using the heat embossing/watercolor wash technique I learned on day one.  (I also showed an example of this here.) 


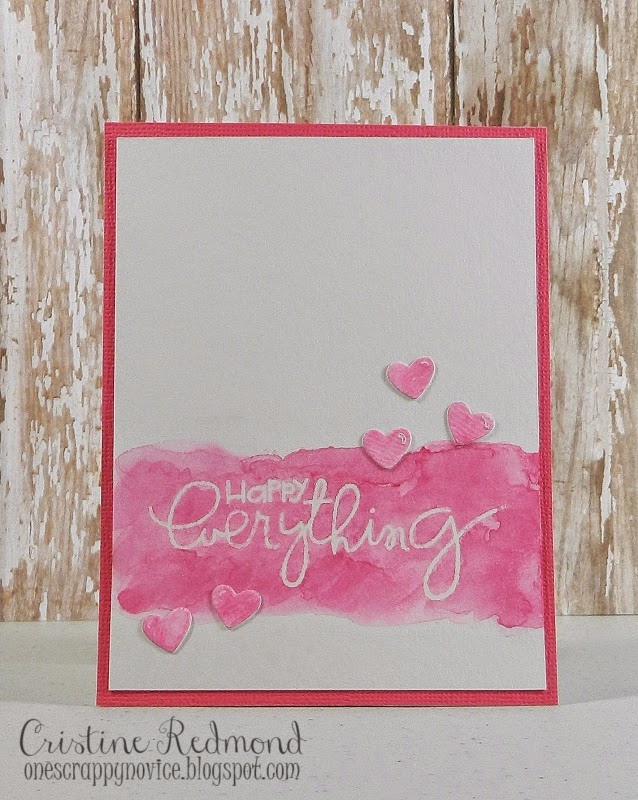
First I drew lines on the page just above and just below where I actually watercolored.  I wanted to make sure I had somewhat straight lines when I was done with this wide border.  Then I stamped my sentiment with Versamark and embossing powder.  Next I used a clean, wet brush to do a water wash where I wanted there to be color.  I then took my brush and dabbed on color and let the water do it's job, spreading the color everywhere I had put water.  I used three varying colors of pink to get what you see.  While I was coloring the wide border, I also did the same thing on a scrap piece of watercolor paper, because I knew I wanted to die cut some hearts to put on the card.  Once the paint was dry, I used my iron to get rid of the embossing powder (put a sheet of paper above and below the watercolor paper).  The embossing powder did not want to come off cleanly, but that just adds to the messy watercolor effect.

It's hard to tell, but I used my clear Wink of Stella glitter pen on the hearts. 


For my next card, I used a technique I learned on day 5:  watercoloring stamped images.


First I stamped my images using my Stampin' Up! ink pads.  Once everything was the way I wanted it, I went back in with the same colored inks and added the watercolor effects.  I added purple inside the flowers to fill them in more, I used the green ink to add shadows on the leaves and I used the blue to give the jar some dimension.  I think it turned out so pretty!  I am submitting this card for this week's Paper Smooches Sparks Challenge theme:  anything goes.  

This next card uses more cards that I made from day 4 of class.  (See another example from this day here.)


I die cut a mustache with watercolor paper and watercolored it with the same Glimmer Mist color I used on the base cards.  Then I stamped the sentiment using similar colors from the card's color scheme.  My 7 year old laughed when she saw this card, so I'd call that a success!  :)  I am submitting this card for this weeks SimonSaysStamp.com Wednesday Challenge, which is Die Crazy!

Thanks for stopping by today!  I'm sure I will have much more to share as I play around some more using techniques I've learned from this amazing class.  Until then...
  photo Signature_zps1df7bf72.png

Tuesday, May 6, 2014

Watercolor Love

I am in love with watercolor on cards.  That is one of the reasons I'm taking the Online Card Class called Watercolor for Card Makers, which started yesterday.  :)  I can't wait to learn more techniques about watercoloring. 

I made a couple cards over the weekend that I wanted to share today. 


I made the watercolor rainbow by blending pink, yellow and blue together in a strip.  I actually did this twice, once here and once on a scrap piece of watercolor paper, because I wanted to die cut hears out of similar-patterned paper.  Once I adhered the hearts, I cover them with my clear Wink of Stella pen to add some subtle shimmer.  I love how it turned out.


Speaking of loving how a card turned out...this is one of my favorites to date.  I made the watercolor strip before anything else was decided about the card.  Once I went through my stamps, I just knew that this cactus stamp from Sweet Stamp Shop would be the perfect accent for the card.  I'm just in love with this card! 

That's all for today!  Hopefully I will have more to share soon!  Until then...

 photo Signature_zps1df7bf72.png

Tuesday, February 25, 2014

AEIheartU Challenge #1

Good Morning!  Yesterday I played along with the AEIheartU Challenge blog and I wanted to share what I created.  This week's challenge theme is Happy Birthday. 


Here is the card I created:


I decided to try a new (to me) technique for this card.  I stamped the backgrounds twice, once using regular inks and once using Versamark and clear embossing powder.  For the top layer, I used watercolor paper because I love how the stamped image shows through.  I love the mix of bold and soft colors on this card.

That's all for now!  Thanks for stopping by today.  Until next time...

Photobucket

Friday, April 26, 2013

Guest Designing Again!

Good morning!  Today I am guest designing for Sweet Stamp Shop again!  This time around I got to play with the new Drops Background stamp set.

Image 1


This set is so completely versatile, if you haven't seen already from the amazing creations the other guest designers have showcased on the SSS blog. 

Here are a couple cards that I created with this set.  The first card uses the heart background.  I stamped the image and dyed the seam binding with the same color so they would coordinate nicely.  Don't you love the fun arrow patterned paper from Simple Stories' 24/7 collection?


My second card uses the dot background in an unconventional way.  When I saw the pattern on the stamp, I knew immediately what I wanted to do with it.  My MIL is retiring from teaching at the end of this school year and I wanted to make her a card for her retirement.  The dots on the stamp worked perfectly to create the bubbles in a glass of champagne!  I stamped the image with Versamark and used clear embossing powder to create the desired effect.  I love how it turned out!


Thanks for stopping by to check out my creations!  I'll be back tomorrow with some new cards for your viewing pleasure.  :)

Until next time...

 Photobucket