Wednesday, February 5, 2014

CAS-ology: Week 81: And

It's a chilly snow day here in the Kansas City area today, so I thought I'd take a look around the web to see if there were any card challenges I could participate in.  I loved the queue for this week's CAS-ology challenge, so I ran with it. 

http://www.casology.blogspot.com/2014/02/week-81-and.html

Here is the card that I made:


I used Sweet Stamp Shop's Kiss Me set (which is now retired).  I thought it would look cute on a chalkboard background and I created the background shape with my Silhouette.  Aaand because no card of mine is complete with hemp twine or enamel dots, I had to throw some on.  I think this turned out so cute and now I don't have to scramble to make a Valentine's Day card for my hubby!  Double win!

I hope you all are having a great week!  I'll be back soon!  Until next time...

Photobucket

Thursday, January 23, 2014

What does the fox say?

For the longest time I had NO IDEA what the fox said or why anyone cared for that matter.  Call me clueless or uninformed, I just didn't get it.  It wasn't until my 7 and 4.5 year olds came home home from school singing the song that I actually googled it to see for myself.  What I found was a witty song that is really pretty great.  (I don't get out much.)  Still clueless as to what I'm talking about?  Click here

When I saw Sweet Stamp Shop's latest release, their Foxy set made me giddy.  Not because I am super trendy and need this stamp to feel cool.  Because believe me, I'm not one of those people.  About a week ago I made a baby blanket for my friend who is having her second son in a couple months.  Without showing you what it looks like because I haven't given it to her yet, just know that this stamp set goes perfectly with it.  I'll post pictures of the blanket after I give it to my friend, so for now you'll just have to settle for the card I made to give to her with it.

I used this week's sketch from CAS(E) this Sketch Challenge as the jumping off point.


 And here is the card I made:


I knew I wanted this card to have double-meaning.  I wanted it to be playful like the song, yet I wanted it to serve it's purpose.  If you look closely at the picture below, you can see that I stamped another speech bubble inside the card.  I layered one on top of it on the front of the card to hide that one.  


And this is what it looks like inside:


I really am in love with this card and can't wait to make more with this set.  Thank you for stopping by!  Until next time!

Photobucket

Monday, January 20, 2014

Fusion Card Challenge: Fusion #2

After dealing with my two girlies who have had the flu for a few days, I decided to get my craft on this weekend.  I came across the Fusion Card Challenge and decided to play along this time around.

Here is the sketch/photo inspiration:
http://fusioncardchallenge.blogspot.com/2014/01/fusion-2.html

And here is the card I made:


Yellow isn't one of my favorite colors, so it was different for me to work with for this challenge.  I am so happy with the way the card turned out, though.  I used my gray ink pad and a water pen to do the shading on the jar and used four different Paper Smooches sets.  For the jar and flowers, I used Crystal Clear; I used part of the "Love" sentiment from Warm Hearts and the heart from Word Salad to make the word "Love"; I used the happy anniversary sentiment and letters from the deepest sympathy stamp from Good Gab to create the rest of the sentiment.  I learned of a stamp masking technique from a Paper Smooches video Savannah O'Gwynn put together.  Stamp masking is NO JOKE.  I started over four times before I finally got this to look the way I wanted it.  It's tedious but man is it cool to be able to create your own sentiment from bits and pieces of a bunch of other stamps!

http://papersmoochessparks.blogspot.com/2014/01/jan-19-25-anything-goes-wk3-challenge.html


I will also be linking this up to this week's Paper Smooches Sparks Challenge: Anything Goes.  Because, why not, right?

Thanks for stopping by!  Until next time...

Photobucket

Tuesday, January 14, 2014

Ribbon Carousel Challenge #89

Hello, hello!  I'm glad to be back today with my very first official post as a member of the Ribbon Carousel Challenge crew! 


I decided to make a get well card because I seem to make a ton of love-themed and birthday cards.  Plus, I wanted another excuse to pull out my Paper Smooches Healthy Vibes stamp set.  :)  Here is my card:

 
To make this card super authentic, I used the corner of a tissue to fill the tissue box.  I have used tissue paper for this in the past as well.  


Be sure to play along with us!  The winner will receive 10 wooden spools filled with your choice of seam binding, baker's twine or May Arts ribbon.  Awesome prize, right?  So link up for your chance to win! 

Thanks for stopping by!  Until next time...


Photobucket

Sunday, January 5, 2014

Happy 2014 Friends!

With the new year comes a new resolution:  KEEP THIS BLOG UPDATED!  While I haven't posted very much, I HAVE been making things and even photographing them.  I just haven't been sitting down to show you all what I have been working on.  That's a bummer and I am going to work on it.  Promise.

One thing that should help me get back into the posting game is this little tidbit...I've been chosen to be on the Ribbon Carousel Challenge Blog Design Team!  I am so super excited about working with such an amazingly talented group of women!  I can't wait to get started! 

I will be back in a few days with my first post, so for now I will leave you with this cute card I made. 


I love the cards I've been seeing with objects inside of the mason jars, so I thought I would take a stab at it.  I think it turned out pretty cute.  (And it certainly can't hurt that I used all of my favorite color combos.  :) )

I'll be back soon to share more, friends!  Hope your 2014 is off to a great start!  Until next time...


Photobucket

Friday, November 15, 2013

Paper Smooches Sparks Challenge

http://papersmoochessparks.blogspot.com/2013/11/november-11-17-designer-drafts-challenge.html

Happy Friday night everyone!  I played along with this week's Paper Smooches Sparks Challenge and I wanted to share what I made.  Here is the sketch for this week:


http://papersmoochessparks.blogspot.com/2013/11/november-11-17-designer-drafts-challenge.html

And here is the card I made:


I enjoyed throwing this card together and I love how it kind of looks like the mittens are hanging around the pennant. 

That's all for now!  This is a quick post, eh?  :)  Hope you all have a wonderful weekend!  I'll be back soon with more cards that I've been making. 

Until next time...


Photobucket

Friday, November 1, 2013

Kiwi Lane Blog Hop!


Happy Friday, everyone!  Today I am excited to be participating in the November Kiwi Lane Blog Hop!  I have always enjoyed these hops as a follower because I love seeing all the amazing things that can be made using Kiwi Lane's designer templates.  Now I get to show you what I made with mine! 

Make sure to leave a comment at the end of this post because one random winner chosen from one of the participating blogs (including the Kiwi Lane blog), will be given a $25 gift certificate to the Kiwi Lane Shop!!  The winner will be announced on the Kiwi Lane blog on Thursday, November 7th.  Here is the blog lineup in case you get lost or this is the first you're hearing of the hop:

** Cristine Redmond ** You Are Here!

Now that all of the technical stuff is out of the way, let's get this project reveal started!  I was given the Nature template set to work with: 


Being that fall is in full swing in my neighborhood, I was immediately drawn to the two leaf templates in this set.  I thought it would be fun to put together a wreath for my front door. 


Here are the supplies I used:
- wreath (mine was a straw wreath)
- burlap (can be ribbon or fabric cut into strips)
- Kiwi Lane Nature set
- Patterned Paper
- additional embellishments as needed
- glue gun
- a bone folder if it has a rounded edge and a straight edge, or a spoon & knife
- mouse pad or other soft surface

Here is the wreath that I created:


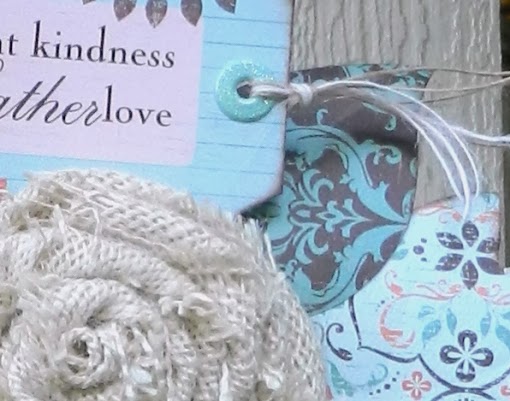
First I wrapped the wreath using burlap ribbon with a frayed edge to give the wreath a bit of visual interest.  Then I used the templates to cut out leaves from various papers from Authentique's Gathering collection.  I wanted to make these leaves look like more than just paper, so I flipped my leaves over to the side I wasn't going to be showing and used the rounded side of my bone folder in a circular motion to make the edges of the leaves curl up.  Then I flipped the leaves over and used the straight edge of my bone folder to create lines to look like the veins in the leaves.  Sounds complicated, but it was super quick and easy and gave the leaves so much more dimension (it's hard to see from the pictures).   


I used some lighter colored burlap fabric to make the rosettes, using my glue gun to keep them together and then to adhere them to the wreath.  What is the saying?  "I craft, therefore I have no fingerprints."  Yeah, that was me last weekend.  :)


I added a couple extra leaves and another rosette to the top of the wreath to balance out the heaviness of the other side.

I am SO HAPPY with the way this wreath turned out! As a self-proclaimed "novice," I've always wanted to make a pretty wreath but have always thought it would be too hard.  This came together so quickly and easily and I am so proud to have it hanging on my front door now.

Thank you so much for hopping by!  Don't forget to leave a comment to be entered in the drawing for a $25 gift certificate to the Kiwi Lane Gift Shop!!  Now hop on over to Joy Nielson's blog to see the amazing project she created!

Until next time,

Photobucket